The following article is for NODA Leaders wanting to email members of a NODA community or event. If you need to communicate with the entire membership, contact [email protected] for assistance.
Communication with members/participants can be done through NODA Connect. There are two options for emailing members/participants:
- Use the integrated email tool within NODA Connect
- Download the community roster and use a separate email program.
Use the integrated email tool within NODA Connect
Step 1: Log into NODA Connect
To login to NODA Connect use your NODA membership credentials (the same as your NODA member portal).
Step 2: Find Your NODA Community
Using the drop down under Communities in the main menu and select My Communities.
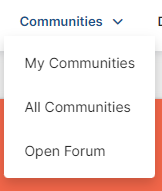
From the list of communities presented, select the community you wish to email.
Step 3: Navigate to the Email Service
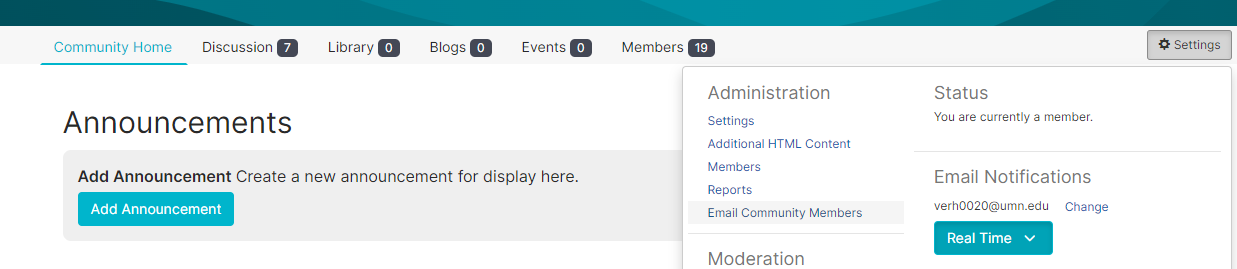
On the main community menu, click the Settings button on the right-hand side. In the settings menu, select Email Community Members. If option does not appear, contact the NODA Office for assistance.
Step 4: Compose your email
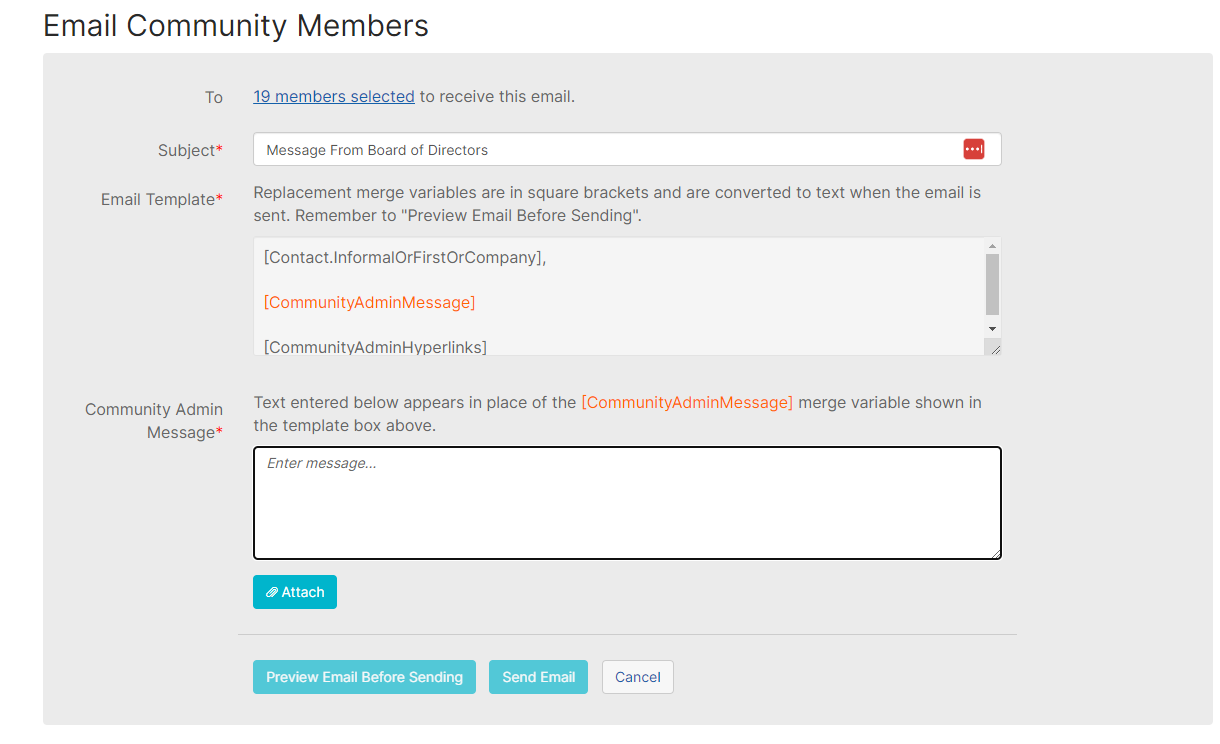
You can customize the Subject line and enter your desired text in the Community Admin Message box.
The text box is a plain text editor and does not support pasting rich (formatted) text. If you would like to format your message, you need to first compose your message in a HTML Editor like https://onlinehtmleditor.dev/.
- Compose and style your message
- Select the blue Edit HTML Source Code button.
- Select and copy the entire HTML code
- Paste the copied code into the Community Admin Message box in NODA Connect.
The emailer allows you to attach multiple documents to your message using the Attach button, if needed.
Step 5: Preview your Message
Use the Preview Email Before Sending button to see your message as it will be sent to community members. You can also use this option to send a test message directly to a specified email account.
Step 6: Send Your Message
Use the Send Email button to send your message to all community members. Messages are delivered immediately and a copy should appear in your inbox within 10 minutes.
Download the community roster and use a separate email program
NOTE: NODA Leaders are responsible for download member data! Downloaded data should be deleted after each use. Member data can only be used for NODA purposes and cannot be shared, sold, or otherwise distributed by NODA leaders.
Step 1: Log into NODA Connect
To login to NODA Connect use your NODA membership credentials, the same as your NODA member portal.
Step 2: Find Your NODA Community
Using the drop down under Communities in the main menu select My Communities.
From the list of communities presented, select the community you wish to email.
Step 3: Navigate to the Member Roster
On the main community menu, click the Members tab.

Step 4: Export the Roster
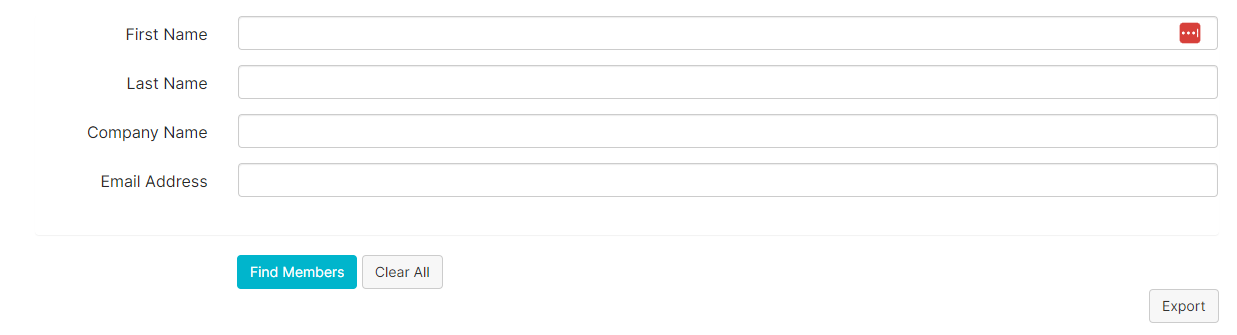
Under the member search tool on the right-hand side click the Export button. Choose which file format you would like and the download will begin automatically. If button does not appear, contact the NODA Office for assistance.
Step 4: Copy Emails into Another Email Program
Open the downloaded files and find the column with user emails. Copy and paste the downloaded emails into your desired email program.